
Replacing and/or Sealing Window Glass
by Phil Lapin / CPPC Tech Committee and President
Let me begin by saying this is literally “sticky subject matter!” When restoring our 1942 Plymouth, I ordered and installed a complete set of flat glass. These, in combination with the curved rear window, were all installed using new Steele Rubber gasket materials. The job went quite well, but I found it a very messy project. After completion, I came up with a motto: “squeeze now / clean later!”
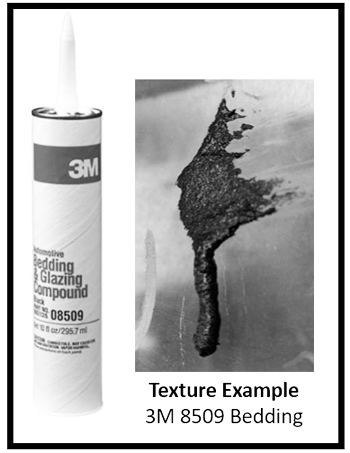 I had watched numerous YouTube videos trying to learn about glass installation. Unfortunately, most of them dealt with much newer vehicles than ‘40s cars, and using different install methods. I also spoke to a number of people about the project, and got several different suggestions about what to use as a sealant. I finally settled upon 3M “Auto Bedding and Glazing Compound 8509”, which is what Steele Rubber and 3M both recommend. I ordered 2 tubes (it took 1 ½ tubes to do 5 major pieces of glass). Both the rubber to outer surface glass and the rubber to body sealing used this same material. This article refers to cars of the ‘30s and ‘40s using a rubber gasket system.
The initial placement of glass was done without any sealant used. This worked well and prevented any possible messes on the interior of the car. Prior to doing the sealing, I used a solvent cleaner wherever the bedding compound was to go. Using Steele Rubber gaskets allowed me to bend back the gaskets sufficiently to clean these areas. That flexibility also helped during bedding application.
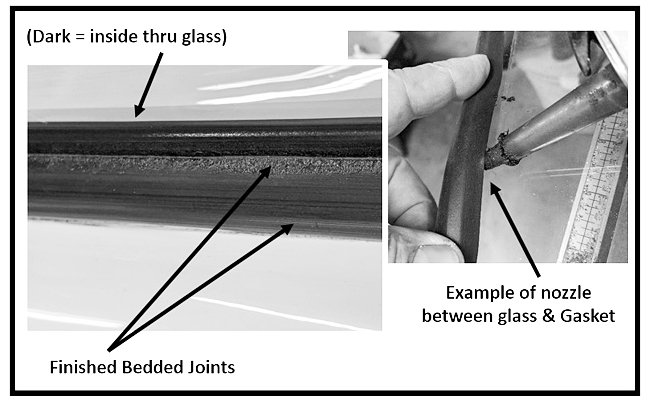
After prepping the surfaces, I cut the tip off of the bedding compound cartridge – leaving as small of a hole as possible. I had also purchased a good caulking gun – one with more leverage and pressure capability than the cheapie ones. A plastic device with about a ¾ inch thin flat end to separate the rubber from the glass and metal was also used. That, plus a LOT of paper towels latex gloves and xylene solvent!
By gently prying the rubber to glass joint apart, then inserting the compound nozzle, I was able to go completely around each window. When the nozzle slipped out, I used the plastic tool again to open the seam up. I squeezed in enough of the compound to where I could see it beginning to ooze out here and there. Without touching it, I then moved to the joint between the rubber and metal body – repeating the exact same process. After each window was done, I gently and evenly pressed down on the rubber to both squeeze out excess compound and to insure a complete seal. After that, I used a plastic scraper to remove as much excess bedding compound as possible. That was followed by using a paper towel saturated with xylene – gently wiping down and smoothing the joints. Then – leave it alone! The material does not harden, but firms up in about 45 minutes. Any remaining haze can be wiped clean after a few days.
I imagine that an already installed window with leaks could benefit from this same treatment. If not by prying open the joint areas, then try putting a bead of compound on the joint and forcing it in using a small putty knife.
Hopefully, this article will help to remove the “fears” I encountered about the process. Just be sure to stay relaxed, wear old clothes and keep plenty of paper towels handy. Good luck with your project!
P.L.